Peanut Butter Banana Muffins
This post may contain affiliate links. As an Amazon Associate, I earn from qualifying purchases. If you click and buy, we may earn a small commission at no extra cost to you. Learn more.
Welcome to my kitchen, friends! I’m super excited to share a favorite recipe with you today. These homemade muffins mix creamy nut butter with sweet, ripe fruit.
When nut butter and ripe fruit come together, magic happens. They create a breakfast treat that’s moist, fluffy, and full of flavor. It’s a joy for your taste buds!
Looking for the perfect morning snack or something to share? These banana bread muffins are perfect every time. They fill your kitchen with a wonderful aroma, like a warm hug.
This recipe is easy for anyone to make. You don’t need fancy tools or hard techniques. Just simple ingredients and a bit of love. Once you try these, you’ll never go back to store-bought again!
Contents
- 1 Why These Homemade Muffins Beat Store-Bought Every Time
- 2 Gathering Your Ingredients for Peanut Butter Banana Muffins
- 3 Essential Equipment and Kitchen Setup
- 4 Preparing Your Ingredients Step-by-Step
- 5 Mixing the Perfect Muffin Batter
- 6 Baking Process and Timing
- 7 Cooling and Finishing Techniques
- 8 Common Mistakes and How to Fix Them
- 9 Creative Variations and Flavor Combinations
- 10 Storage Tips and Serving Ideas
- 11 Nutritional Benefits and Dietary Adaptations
- 12 Peanut Butter Banana Muffins
- 13 Conclusion
- 14 FAQ
- 14.1 How ripe should my bananas be for the best Peanut Butter Banana Muffins?
- 14.2 Can I use crunchy peanut butter instead of creamy?
- 14.3 Why are my muffins dense and heavy instead of fluffy?
- 14.4 How do I know when my muffins are perfectly done?
- 14.5 Can I make these muffins gluten-free?
- 14.6 How should I store these muffins to keep them fresh?
- 14.7 Can I reduce the sugar in this recipe?
- 14.8 What’s the best way to fill the muffin cups?
- 14.9 Can I make these muffins vegan?
- 14.10 Why did some of my muffins bake unevenly?
- 14.11 What are some delicious add-ins I can try?
- 14.12 How long do I need to let the muffins cool before removing them?
Key Takeaways
- Perfect combination of creamy nut butter and sweet ripe fruit flavors
- Moist, fluffy texture that’s ideal for breakfast or snacking
- Simple recipe suitable for bakers of all experience levels
- No fancy equipment or complicated techniques required
- Fills your kitchen with amazing aromas while baking
- Superior taste compared to store-bought alternatives
Why These Homemade Muffins Beat Store-Bought Every Time
Homemade peanut butter banana muffins are truly magical. They outshine store-bought ones in every way. With this easy muffin recipe, you control every ingredient. Say goodbye to unknown preservatives and hello to real, pronounceable ingredients!
The texture of homemade muffins is incredible. They turn out moist and fluffy, just like we love. Store-bought muffins often feel dry and taste like cardboard.

There’s nothing like the taste and smell of muffins fresh from your oven. The aroma fills your kitchen, making it irresistible. You can’t replicate this with pre-made muffins.
Customization is key. You can tweak sweetness, add your favorite ingredients, or make them healthier. This makes your easy muffin recipe uniquely yours.
Homemade muffins save you money and give you a sense of pride. They’re a fraction of the cost of bakery muffins. Plus, you get to enjoy the satisfaction of baking them yourself.
Your loved ones will be impressed! You’ll become the favorite baker in your group. All thanks to these moist muffins that show off your baking talent.
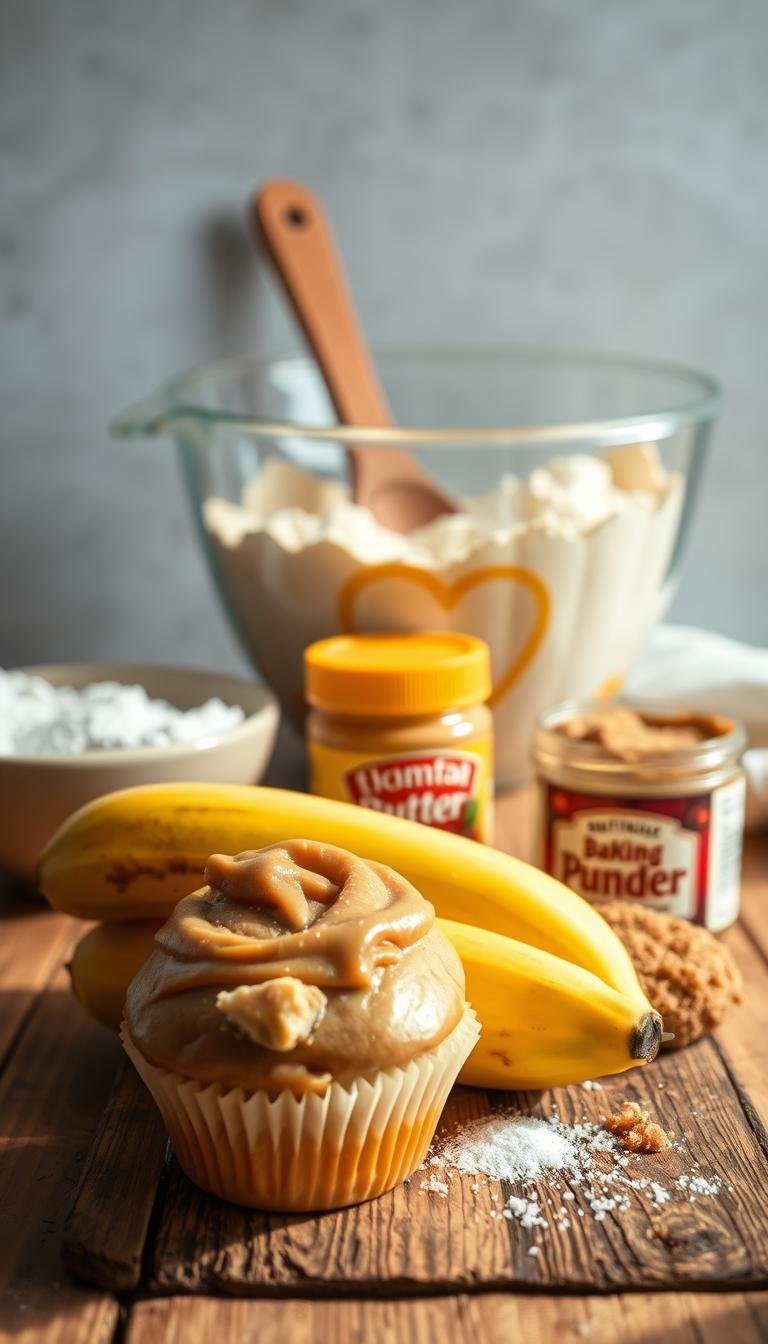
Gathering Your Ingredients for Peanut Butter Banana Muffins
Let’s explore the ingredients you’ll need for your breakfast muffins. This recipe uses simple, wholesome ingredients that blend perfectly. You might even have most of these items in your kitchen already!
Organizing your ingredients before you start mixing makes baking easier. Do a quick pantry check and arrange everything on your counter. This way, you won’t have to search for that vanilla extract when you’re already halfway through!
Selecting the Perfect Ripe Bananas
Your bananas are the star of this recipe, so pick the right ones. Look for bananas with brown spots on the peel. These bananas are perfectly ripe for baking.
Those brown spots mean the bananas have turned into natural sugars. This gives you that intense, sweet banana flavor we’re all after.
If your bananas are yellow, don’t worry! You can ripen them by placing them in a paper bag for a day or two. The ethylene gas will do its magic.
Choosing the Best Peanut Butter Type
For the best peanut butter recipe, use creamy, natural peanut butter. This gives you the purest peanut flavor and the best texture. Regular creamy peanut butter works well too!
Avoid crunchy peanut butter unless you want extra texture. Natural peanut butter might need stirring before measuring, because the oil can separate.
Essential Dry and Wet Ingredients
Your dry ingredients are key for fluffy, tender breakfast muffins. You’ll need all-purpose flour, baking powder, baking soda, and a pinch of salt. These ingredients help your muffins rise and have the right texture.
For wet ingredients, use room temperature eggs for easier blending. You’ll also need milk, vanilla extract, and a bit of melted butter or oil for moisture. Don’t forget brown sugar – it complements those banana flavors perfectly!
| Ingredient Type | Specific Ingredient | Amount Needed | Key Purpose |
|---|---|---|---|
| Fruit | Ripe Bananas | 3 medium | Natural sweetness and moisture |
| Protein | Creamy Peanut Butter | 1/2 cup | Rich flavor and texture |
| Dry Base | All-Purpose Flour | 2 cups | Structure and body |
| Leavening | Baking Powder | 1 1/2 tsp | Rise and fluffiness |
| Binding | Large Eggs | 2 eggs | Structure and richness |
Essential Equipment and Kitchen Setup
Before you start mixing that delicious banana muffin batter, let’s get your kitchen ready for baking success! This recipe is simple. You won’t need fancy gadgets or expensive equipment.
Making muffins is easy with the right setup. Most home bakers already have what they need to make these treats!
Must-Have Baking Tools
You’ll need a few basic items for baking success. A standard 12-cup muffin tin is perfect. I suggest non-stick or silicone-lined ones for easy release.
Here’s what you’ll need for perfect results:
| Essential Tool | Purpose | Alternative Option |
|---|---|---|
| 12-cup muffin tin | Baking vessel | Silicone muffin cups |
| Mixing bowls (2-3 sizes) | Combining ingredients | Large measuring cups |
| Measuring cups and spoons | Accurate portions | Kitchen scale |
| Potato masher or fork | Mashing bananas | Large spoon |
Preparing Your Workspace
Preparing your workspace makes baking more enjoyable! Clear your counter and gather all tools in one place.
Follow these baking tips for a smoother process: preheat your oven to 375°F before starting. Grease your muffin tin or use paper liners to prevent sticking. Keep a damp kitchen towel nearby for quick cleanups!
Organization makes baking less stressful and more delightful. When everything is in its place, you can focus on making that perfect banana muffin batter with confidence and joy!
Preparing Your Ingredients Step-by-Step
Getting your ingredients ready right is key to making perfect healthy muffins! This step is essential for success. By prepping your muffin ingredients well, you ensure tasty results every time.
Properly Mashing Bananas
Start with those gorgeous ripe bananas – they’re the star of your healthy muffins! I use a fork or potato masher to get the right texture. You want them mashed but with a bit of chunkiness.
Those banana pieces add wonderful bursts of flavor in every bite! Don’t aim for a smooth mix. The small chunks make homemade muffins better than store-bought ones.
Measuring Ingredients Accurately
Measuring ingredients right is key for perfect muffins! For flour, I use the spoon-and-level method. Spoon it into your measuring cup and level off with a knife.
This method helps avoid dense, heavy muffins. For wet ingredients, use liquid measuring cups at eye level. Trust me – this detail makes a big difference in your results.
| Ingredient Type | Measuring Method | Key Tip | Common Mistake |
|---|---|---|---|
| Flour | Spoon and level | Don’t pack down | Scooping directly |
| Liquid ingredients | Eye-level measurement | Use glass measuring cup | Measuring on counter |
| Peanut butter | Level with spatula | Room temperature works best | Cold, hard peanut butter |
| Brown sugar | Pack firmly | Should hold cup shape | Loose measuring |
Preheating Oven and Preparing Muffin Tin
Preheat your oven to 375°F while you prep. This temperature ensures muffins rise well and have golden tops.
It’s important to grease your muffin tin well for easy removal. I grease each cup with butter or cooking spray. Paper liners are good too, but lightly spray them to prevent sticking.
Mixing the Perfect Muffin Batter
Mixing your muffin batter right turns simple ingredients into bakery-style perfection! This step is key to getting tender, fluffy muffins or dense, disappointing ones. It’s all about the science of mixing.
I’m excited to share tips that will make your muffins amazing! The way you mix ingredients is what makes the difference in texture.
Combining Dry Ingredients First
Begin by whisking dry ingredients in a big bowl. This includes flour, baking powder, baking soda, salt, and spices for your quick bread recipe.
Whisking ensures even mixing. This avoids bitter spots from baking soda in your muffins.
Watching ingredients mix together is exciting. It’s like building the base for something great!
Creating the Wet Ingredient Mixture
In another bowl, mix mashed bananas, peanut butter, eggs, milk, vanilla, and oil. Make sure peanut butter is well-stirred to avoid lumps.
Whisk these wet ingredients until smooth and creamy. This step adds moisture and flavor to your quick bread!
The Critical Folding Technique
The most important part is the folding technique! Pour wet ingredients into dry ingredients and gently fold with a spatula.
Remember, don’t overmix! Avoid stirring until it’s perfectly smooth. Overmixing makes muffins tough, not tender bakery-style muffins.
Fold until just combined. The batter should be slightly lumpy for the perfect texture!
| Mixing Method | Result | Texture | Best Practice |
|---|---|---|---|
| Gentle Folding | Tender Muffins | Light and Fluffy | Stop when barely combined |
| Overmixing | Dense Muffins | Tough and Chewy | Avoid excessive stirring |
| Undermixing | Uneven Texture | Flour Pockets | Fold until just incorporated |
Baking Process and Timing
Now, the fun part begins – watching your homemade muffin recipe bake in the oven! This stage turns your batter into golden, fluffy treats. Your kitchen will smell amazing.
The baking process needs attention, but I’ve got you covered. Getting the timing and temperature right ensures your muffins turn out perfect.

Filling Muffin Cups for Even Results
Filling your muffin cups right is key for even results. I fill each cup about 2/3 full. This lets the muffins rise without overflowing.
Use an ice cream scoop or large spoon to distribute the batter evenly. This ensures they bake at the same rate and look uniform. Trust me, even distribution is worth it!
Optimal Baking Temperature and Duration
Your oven should be at 375°F for muffins. This temperature is perfect for a lovely rise and golden top.
Place your muffin tin on the center rack and set your timer for 18-22 minutes. Don’t open the oven door for the first 15 minutes. Sudden changes can make your muffins sink!
Testing for Perfect Doneness
To check if they’re done, insert a toothpick into the center of a muffin. It should have a few moist crumbs. The tops should be golden brown and spring back lightly.
Different muffin recipes might need slight timing changes. But these guidelines work well for most. Your kitchen will smell incredible while you wait!
| Baking Stage | Temperature | Time | Visual Cues |
|---|---|---|---|
| Initial Rise | 375°F | 0-8 minutes | Batter begins to set |
| Active Baking | 375°F | 8-15 minutes | Tops start browning |
| Final Stage | 375°F | 15-22 minutes | Golden tops, springs back |
| Doneness Test | 375°F | 18-22 minutes | Toothpick with few crumbs |
Cooling and Finishing Techniques
Your fresh baked muffins need proper cooling to reach their full flavor! The cooling process is as important as baking. It’s what makes your muffins have that perfect muffin texture we all love.
When your timer goes off and your muffins are golden, don’t rush to take them out. It’s hard to wait when they smell so good, but it’s worth it!
Proper Cooling Methods
Let your muffins cool in the tin for about 5 minutes first. This helps them set right. It keeps them from falling apart when you take them out.
Then, put your muffins on a wire cooling rack. The rack lets air get to the muffins. This stops the bottoms from getting soggy from steam.
If you don’t have a wire rack, a clean kitchen towel works too! Let them cool for at least another 10-15 minutes before you can eat them.
Safe Removal from Pan
Gently turn the muffin tin upside down on a wire rack. You can also use a butter knife to loosen the edges first.
If you used paper liners, they should come out easily. Just lift them right out! This cooling time makes sure your muffins are tender, moist, and delicious.
Common Mistakes and How to Fix Them
Even experienced bakers face common muffin challenges. But with the right baking troubleshooting tips, you can make perfect muffins every time! I’ve seen these mistakes in kitchens everywhere. The good news is that they’re fixable once you know what to watch for!
Don’t worry if your first few batches aren’t perfect. Every baker learns through trial and error. Each “oops” moment teaches you something valuable about your oven and ingredients.

Avoiding Dense, Heavy Muffins
Dense, heavy muffins often come from overmixing your batter. When you see flour streaks, stop stirring! Lumps are actually your friend when it comes to tender muffins.
Using too much flour is another sneaky culprit. Always spoon flour into your measuring cup and level it off with a knife. Scooping directly from the bag packs way too much flour in there!
If you’re getting heavy results, check your baking powder. Old leavening agents won’t give you the lift you need for perfect muffins.
Preventing Dry or Crumbly Texture
Dry, crumbly muffins usually mean overbaking or not enough moisture in your batter. Make sure those bananas are really ripe – those brown spots are key for natural sweetness and moisture!
Don’t skip the oil or butter in your recipe. These fats keep your muffins tender and prevent that dreaded sawdust texture. Also, check your oven temperature with a thermometer – many ovens run hot and can dry out muffins quickly.
Solving Uneven Baking Issues
Uneven baking often happens when your oven has hot spots or muffin cups aren’t filled evenly. Try rotating your muffin tin halfway through baking for better baking troubleshooting results.
Always use the center rack for the most even heat distribution. If some muffins brown faster than others, cover them loosely with foil during the last few minutes of baking.
Fill each cup about two-thirds full for consistent results. This ensures even rising and prevents some muffins from overflowing while others stay flat!
Creative Variations and Flavor Combinations
Ready to make your muffins truly special? It’s time to get creative! I love trying out different muffin recipe variations. Each batch is a tasty journey.
Chocolate and Nut Add-ins
Chocolate fans, rejoice! Add half a cup of mini chocolate chips for a burst of chocolate. Dark chocolate chunks add a sophisticated touch.
For the best banana nut muffins, use chopped walnuts or pecans. They add a nice crunch and pair well with peanut butter. Sliced almonds bring a delicate texture that’s heavenly!
Spice and Extract Variations
A teaspoon of cinnamon makes these muffins cozy. Add a pinch of nutmeg for a warm, deep flavor. Your kitchen will smell amazing!
Try almond extract instead of vanilla for a unique flavor. Maple extract adds a breakfast feel that goes well with bananas. Start with half a teaspoon and adjust as needed.
Healthy Substitution Options
Use half whole wheat flour for more fiber. Greek yogurt can replace some oil, adding protein and keeping muffins moist.
Use unsweetened applesauce or mashed dates to cut sugar. Pure maple syrup is great for avoiding refined sugar.
| Add-in Type | Amount | Flavor Profile | Best Pairing |
|---|---|---|---|
| Mini Chocolate Chips | 1/2 cup | Sweet, rich | Dark cocoa powder |
| Chopped Walnuts | 1/2 cup | Nutty, crunchy | Cinnamon spice |
| Cinnamon | 1 teaspoon | Warm, cozy | Maple extract |
| Greek Yogurt | 1/4 cup | Tangy, moist | Reduced oil |
Remember, keep add-ins to about three-quarters cup. This way, your banana and peanut butter base stays the star!
Storage Tips and Serving Ideas
Your freshly baked peanut butter banana muffins deserve the best care. This keeps their taste and texture amazing! The right storage methods will keep these treats fresh for days or even months.
I always get excited about storing muffins properly. It means more chances to enjoy them later. Here are my favorite techniques that always work!
Keeping Muffins Fresh
Room temperature storage is great for short-term enjoyment. Place your cooled muffins in an airtight container with a paper towel at the bottom.
This trick absorbs moisture and prevents sogginess! Your muffins will stay perfectly fresh for up to three days this way.
Freezing and Reheating Methods
Freezing is your best friend for longer storage! Wrap each muffin in plastic wrap, then store them in a freezer-safe container.
They’ll stay great for up to three months. When you’re ready, microwave frozen muffins for 30-60 seconds or thaw naturally for an hour.
| Storage Method | Duration | Best Practice | Reheating Time |
|---|---|---|---|
| Room Temperature | 3 days | Airtight container with paper towel | Ready to eat |
| Refrigerator | 1 week | Wrapped in plastic | 30 seconds microwave |
| Freezer | 3 months | Individual wrapping | 60 seconds microwave |
Creative Serving Suggestions
These versatile muffins are great for breakfast ideas and more! Slice them in half and spread with extra peanut butter for a special morning treat.
Try crumbling them over yogurt or ice cream for dessert. They’re perfect for lunch boxes, potluck gatherings, or with your morning coffee!
Nutritional Benefits and Dietary Adaptations
I love that these muffins are not just tasty treats. They are nutritional powerhouses that support your wellness goals! When you’re diving into healthy baking, it’s amazing to discover how simple ingredients can pack such incredible benefits. These nutritious muffins prove that delicious and wholesome can go hand in hand perfectly.
Health Benefits of Key Ingredients
Bananas are absolute nutritional superstars! They’re loaded with potassium for heart health and vitamin B6 for brain function. The fiber content supports digestive wellness, while their natural sweetness means we need less added sugar.
Peanut butter brings healthy fats, protein, and vitamin E to every bite. This combination of protein and healthy fats keeps you satisfied longer – perfect for busy mornings or afternoon energy slumps!
Gluten-Free and Vegan Modifications
Making these muffins gluten-free is surprisingly simple! Just substitute all-purpose flour with your favorite gluten-free flour blend. I recommend ones with xanthan gum already included for the best texture.
For vegan-friendly versions, use plant-based milk and replace eggs with flax eggs. Mix 1 tablespoon ground flaxseed with 3 tablespoons water per egg. Always check that your peanut butter doesn’t contain honey!
Reducing Sugar and Calories
You can easily cut brown sugar in half and add extra mashed banana for natural sweetness. Unsweetened applesauce works wonderfully to replace some oil. Adding oats or ground flaxseed boosts fiber content significantly.
| Modification Type | Substitution | Benefit | Texture Impact |
|---|---|---|---|
| Sugar Reduction | Half brown sugar + extra banana | Lower calories, natural sweetness | Slightly denser |
| Oil Replacement | Unsweetened applesauce | Reduced fat content | More tender |
| Protein Boost | Greek yogurt addition | Higher protein content | Extra moist |
| Fiber Enhancement | Ground flaxseed or oats | Improved digestive health | Heartier texture |
The beauty of homemade baking is complete ingredient control! You can customize these muffins to fit your family’s dietary needs perfectly. Healthy eating doesn’t mean sacrificing incredible flavor!
Peanut Butter Banana Muffins
Ingredients
- 3 ripe bananas (mashed)
- 1/2 cup creamy peanut butter
- 2 cups all-purpose flour
- 1 1/2 tsp baking powder
- 1/2 tsp baking soda
- 1/4 tsp salt
- 2 large eggs
- 1/2 cup brown sugar (packed)
- 1/3 cup milk
- 1 tsp vanilla extract
- 1/4 cup melted butter or oil
- Optional: 1/2 cup mini chocolate chips or chopped nuts
Instructions
- Preheat oven to 375°F (190°C). Line or grease a 12-cup muffin tin.
- In a large bowl, whisk flour, baking powder, baking soda, and salt.
- In another bowl, mix mashed bananas, peanut butter, eggs, brown sugar, milk, vanilla, and melted butter until smooth.
- Pour wet mixture into dry ingredients and fold gently until just combined. Don’t overmix!
- If using, fold in chocolate chips or nuts.
- Divide batter evenly into muffin cups, filling each about 2/3 full.
- Bake for 18–22 minutes or until a toothpick inserted comes out with moist crumbs.
- Cool in tin for 5 mins, then transfer to a wire rack. Enjoy warm or cool!
Conclusion
You now have everything needed for homemade baking success with these delicious peanut butter banana muffins! I’m excited for you to experience the amazing aroma filling your kitchen. And the smiles on your family’s faces will be priceless.
This perfect muffin recipe gives you a solid foundation to build upon. Feel free to experiment with different add-ins and variations we discussed. Each batch you make will teach you something new about your oven and preferences.
Remember that baking is a journey of discovery. Some days your muffins might turn out extra fluffy, other days they’ll have a denser texture – both are delicious! The beauty of homemade treats lies in their unique character and the love you put into making them.
These muffins work perfectly for busy mornings, afternoon snacks, or thoughtful gifts for neighbors. Keep this recipe handy because once people taste your homemade peanut butter banana muffins, they’ll be asking for more!
Your kitchen is now ready to create countless batches of these crowd-pleasing treats. Trust the process, enjoy the experience, and most importantly – have fun baking!