Apple Cinnamon Muffins with Streusel
This post may contain affiliate links. As an Amazon Associate, I earn from qualifying purchases. If you click and buy, we may earn a small commission at no extra cost to you. Learn more.
Welcome to my cozy kitchen! Today, I’m excited to share a fall baking treasure with you. These tender, spiced treats mix juicy fruit with warm autumn flavors. Your home will smell divine.
There’s something special about homemade muffins fresh from the oven. The buttery crumble topping adds a perfect crunch. I’ve perfected this recipe over years, and it always impresses family and friends.
Need breakfast recipes for busy mornings or a cozy snack? These treats are perfect. The warm spices and tender crumb make them comfort food magic. Your kitchen will smell like autumn heaven, and everyone will ask for seconds!
Contents
- 1 Why These Apple Cinnamon Muffins with Streusel Are the Perfect Fall Treat
- 2 Essential Ingredients for Bakery-Quality Muffins
- 3 Required Equipment and Kitchen Tools
- 4 Step 1: Preparing Your Apples
- 5 Step 2: Making the Streusel Topping
- 6 Step 3: Mixing the Muffin Batter
- 7 Step 4: Preparing Muffin Pans and Portioning Batter
- 8 Step 5: Baking to Golden Perfection
- 9 Cooling and Storage Best Practices
- 10 Troubleshooting Common Baking Issues
- 11 Delicious Variations and Serving Suggestions
- 12 Apple Cinnamon Muffins with Streusel
- 13 Conclusion
- 14 FAQ
- 14.1 What are the best apples to use for Apple Cinnamon Muffins with Streusel?
- 14.2 How do I prevent my muffins from becoming dense or tough?
- 14.3 Can I make the streusel topping ahead of time?
- 14.4 When should I add the streusel topping during baking?
- 14.5 How do I know when my Apple Cinnamon Muffins are perfectly done?
- 14.6 How should I store these muffins to keep them fresh?
- 14.7 Can I add nuts or other mix-ins to this recipe?
- 14.8 Why do my muffins have soggy bottoms?
- 14.9 Do I need any special equipment to make these muffins?
- 14.10 How do I prevent the apples from sinking to the bottom?
- 14.11 Can I make these muffins gluten-free or with dietary substitutions?
- 14.12 What’s the best way to serve Apple Cinnamon Muffins with Streusel?
Key Takeaways
- Perfect fall baking recipe combining tender fruit pieces with warm spices
- Features an irresistible buttery crumble topping for extra texture and flavor
- Ideal for weekend breakfast treats, afternoon snacks, or sharing with neighbors
- Creates bakery-quality results with simple homemade muffins techniques
- Fills your kitchen with cozy autumn aromas that bring everyone together
- Versatile breakfast recipes perfect for busy mornings or leisurely weekends
Why These Apple Cinnamon Muffins with Streusel Are the Perfect Fall Treat
These apple cinnamon muffins with streusel are more than just a treat. They’re a warm hug in muffin form that captures the essence of fall. They’re my favorite among all apple recipes.
What makes these muffins special? They’re a taste of autumn in every bite. The cinnamon spice fills your kitchen with a cozy aroma. Fresh apples add natural sweetness and a tender texture.

These autumn treats are versatile. They’re perfect for a quick breakfast or a weekend brunch. The streusel topping adds a special touch, making them perfect for holiday gatherings.
These muffins are beginner-friendly. You don’t need fancy equipment or advanced baking skills. Most ingredients are probably in your pantry. The recipe is forgiving, so even beginners will get great results.
They’re also practical. These muffins freeze beautifully for up to three months! Just wrap them individually and freeze. When you want that fresh-baked taste, thaw one at room temperature or warm it in the microwave for 20 seconds.
| Benefit | Why It Matters | Perfect For |
|---|---|---|
| Seasonal Flavors | Uses peak fall ingredients | Holiday gatherings |
| Beginner-Friendly | Simple techniques and common ingredients | New bakers |
| Bakery-Style Presentation | Impressive streusel topping | Special occasions |
| Freezer-Friendly | Make ahead convenience | Busy schedules |
Trust me, once you make these muffins, they’ll be your go-to for any occasion. They’re pure fall magic in muffin form!
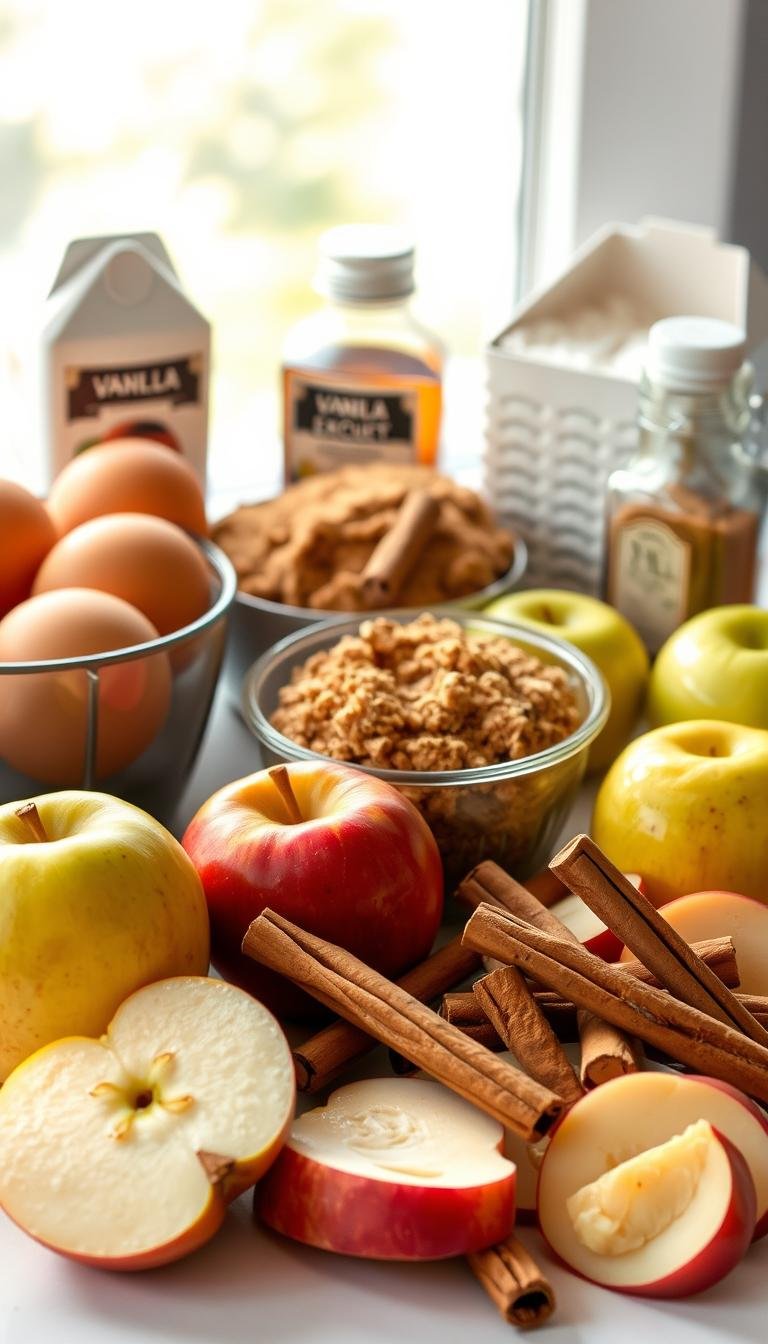
Essential Ingredients for Bakery-Quality Muffins
Let me share the secret ingredients that make muffins extra special! These muffin ingredients are easy to find and won’t break the bank. But when mixed just right, they create something truly amazing.
Quality is key. Using real butter instead of margarine makes a big difference. Fresh eggs and pure vanilla extract might seem small, but they make a big impact!
Selecting the Best Apples for Baking
Not all apples are good for baking. You need ones that stay firm during baking. Granny Smith apples are my top pick because they’re tart and firm.
Here are my favorite apples for muffins:
- Granny Smith – Tart flavor and maintains structure
- Honeycrisp – Sweet with excellent texture retention
- Braeburn – Perfect balance of sweet and tart
- Gala – Mild sweetness that complements spices
Avoid soft apples like Red Delicious. They’ll make your muffins soggy. This baking tip is a game-changer!
Spice Blend for Maximum Flavor
Cinnamon is the star spice, but a blend is magic! I mix spices to create a warm flavor that everyone loves.
My special spice mix includes:
- Ground cinnamon – 2 teaspoons for that classic warmth
- Fresh nutmeg – Just a pinch for depth
- Ground allspice – A whisper for complexity
- Vanilla extract – Pure, not imitation
It’s all about balance. Too much nutmeg is overpowering. Too little allspice and it’s missing that special touch.
Streusel Topping Components
The streusel topping is the real magic! Those golden crumbles everyone loves need the right mix and technique.
Here’s what makes perfect streusel:
- Cold butter – Never margarine! Cold butter gives the perfect crumbly texture
- All-purpose flour – Provides structure for those gorgeous crumbles
- Brown sugar – Adds moisture and rich caramel notes
- Extra cinnamon – Because you can never have too much!
The secret is cold butter! Room temperature butter makes a paste, not crunchy pieces. I always cube my butter and keep it cold while I prep.
“The difference between good muffins and great muffins is in the quality of ingredients you choose to use.”
These simple baking tips about ingredients will make your muffins amazing. Each part is important for that perfect bite!
Required Equipment and Kitchen Tools
Making bakery-quality muffins is surprisingly easy! You don’t need a lot of kitchen tools to do it. I believe in making easy baking fun for everyone. With just a few basics, you can make amazing muffins.
A standard 12-cup muffin tin is key. I like non-stick muffin pans because they make taking out muffins easy. You can use paper liners or cooking spray to grease them.
For mixing, you’ll need two bowls. One big one for dry ingredients and a medium one for wet. A simple whisk and wooden spoon are all you need. No electric mixers required!
For apples, you’ll need a sharp knife and cutting board. For the streusel topping, use a pastry cutter or two forks. They work great!
Portioning is easy with an ice cream scoop or large spoon. This ensures your muffins are all the same size. Remember, your measuring cups and spoons are important. Accuracy matters in baking!
A wire cooling rack is best for cooling, but a clean kitchen towel works too. The best part? You probably already have most of these tools at home!
| Essential Tool | Purpose | Alternative Option | Must-Have Level |
|---|---|---|---|
| 12-cup muffin tin | Baking vessel | 6-cup tin (double batch) | Essential |
| Large mixing bowl | Dry ingredients | Any large bowl | Essential |
| Medium mixing bowl | Wet ingredients | Large measuring cup | Essential |
| Whisk and wooden spoon | Mixing batter | Fork and regular spoon | Helpful |
| Ice cream scoop | Portioning batter | Large spoon | Helpful |
I always say good muffins come from technique and love, not expensive tools. These basic kitchen tools will help you make many delicious batches of muffins!
This recipe is simple and works for everyone, whether you’re new to baking or experienced. With these everyday items, you can create something truly special. Let’s make magic happen with what we have!
Step 1: Preparing Your Apples
Apple preparation is where the magic starts. I’m excited to show you how to make your fresh apples perfect for muffins. This step is key to making your muffins truly special.
How you handle your apples affects the muffin’s texture and taste. I’ve honed these baking techniques over years. Now, I get to share them with you!
Proper Peeling and Dicing Techniques
Peeling your apples is best for a tender texture. Use a sharp knife or vegetable peeler. Move from top to bottom in smooth strokes.
For dicing, aim for ¼ to ½ inch pieces. They’re small enough to spread evenly but big enough for a burst of apple flavor in every bite.
My secret trick is to toss diced apples with one tablespoon of flour. This keeps them from sinking to the bottom. Your apples will stay evenly distributed in each muffin.
Coating Apples to Prevent Browning
When baking right away, browning isn’t a big worry. But if you prep your apples ahead, here’s a tip.
Just a sprinkle of fresh lemon juice keeps apples looking fresh. Use a teaspoon or two for two cups of diced apples.
Take your time with this step. Properly prepared apples make all the difference. You can already smell the fresh apple sweetness. You’re creating something truly special!
Step 2: Making the Streusel Topping
It’s time to make the streusel recipe that tops these muffins. This part is my favorite in baking. It’s so rewarding to mix up that buttery goodness that turns into golden peaks.
Make your streusel first and let it chill. Cold streusel is key for those beautiful, craggy tops. It’s what makes bakery-style muffins stand out.
“The secret to exceptional streusel lies in keeping everything cold and working quickly with your hands.” This tip has always helped me make the best crumb topping.
Combining Flour, Sugar, and Spices
Begin by mixing your dry ingredients in a bowl. You’ll need flour, brown sugar, and cinnamon. Watching these ingredients mix is fun, and the cinnamon swirls are beautiful.
Break up brown sugar clumps before mixing. This prevents uneven texture in your topping. A fork is great for this.
The right mix is important. Too much flour makes it tough, and too much sugar is too sweet and can burn.
Creating the Perfect Crumbly Texture
Now, it’s time to use butter techniques to make streusel magic! Your butter should be cold from the fridge. Cut it into small cubes for even mixing.
Add the cold butter cubes to your flour mix. Use a pastry cutter, knives, or your fingers to mix. Aim for a coarse breadcrumb texture with some larger pieces.
Don’t mix too much! The butter pieces are what make it special. They melt during baking, creating a mix of fine and chunky crumbs.
When your streusel is ready, put it in the fridge. Cold streusel bakes better and gives you those perfect, irregular peaks. It makes your muffins look like they came from a bakery!
Step 3: Mixing the Muffin Batter
Now we’re ready to make the perfect muffin batter. This step combines all our ingredients using mixing techniques for a light texture.
The secret to great muffins is in how we mix the ingredients. I’ll guide you through each step to become a pro!

Preparing Dry Ingredients
Start by whisking dry ingredients in a large bowl. Mix flour, sugar, baking powder, salt, and cinnamon.
My pro tip: Sift or whisk these ingredients well. It ensures they’re evenly spread in your muffin batter.
Check for flour lumps. They can make your muffins uneven.
Combining Wet Ingredients
Whisk wet ingredients in another bowl. Use room temperature eggs and milk for easier mixing.
Add cooled melted butter, vanilla extract, and other liquids. Room temperature ingredients help with smooth mixing.
Whisk until everything is well combined. This makes a great batter base!
The Folding Method for Light Muffins
Now, pour wet ingredients into the dry ingredients bowl.
Use a spatula for gentle folding. We’re not stirring hard to keep the light texture.
The batter should look a bit rough. This is perfect! The lumps will bake away, making your muffins tender.
Incorporating Apples Without Overmixing
Lastly, fold in your apples gently. Overmixing is bad for tender muffins!
Don’t make your muffin batter too smooth. A bit of flour streaks are okay – they’ll soak up during baking.
| Mixing Method | Result | Texture | Best For |
|---|---|---|---|
| Gentle Folding | Light, fluffy muffins | Tender crumb | Perfect muffins |
| Vigorous Stirring | Dense, tough muffins | Chewy, heavy | Avoid this method |
| Electric Mixer | Overmixed batter | Rubbery, dense | Never use for muffins |
| Whisk Method | Developed gluten | Tough, chewy | Better for pancakes |
Trust the process! These mixing techniques will give you great results every time. Your batter is now ready for the muffin pans!
Step 4: Preparing Muffin Pans and Portioning Batter
Getting your muffin pans ready is where the magic starts! This step is key to perfect muffins. It ensures they come out easily, not stuck to the pan. I’ve learned that a few extra minutes here save a lot of trouble later!
Proper pan preparation is all about the details. You want your muffins to look as good as they taste. Whether you use liners or go for a rustic look, the right technique is key.
Greasing Techniques for Easy Release
Paper liners are my go-to for easy, professional-looking muffins. They make every batch a success. Just place them in your muffin tin, and you’re ready to go.
For a golden edge, grease each cup with butter or spray. Focus on the corners and edges where muffins tend to stick. I use a pastry brush with melted butter for even coverage.
My secret tip: dust the greased cups with flour after buttering. This extra layer ensures easy release. Just tap out any extra flour before adding your batter.
Proper Filling Amounts
Portion control is vital for uniform muffins. I fill each cup about three-quarters full with a large ice cream scoop or spoon. This allows for perfect rising without overflowing.
Remember to fill any empty cups with water. This prevents uneven baking and keeps the pan from warping. It’s a simple trick that makes a big difference!
Give your filled pan a gentle tap on the counter. This settles the batter and releases air bubbles. This creates that smooth, even top we all love. Take a moment to admire your perfectly portioned batter – you’re almost there!
The anticipation is thrilling at this stage! Seeing the batter in the muffin pans is exciting. Your kitchen will soon smell amazing!
Step 5: Baking to Golden Perfection
Now, your kitchen will fill with amazing smells and golden magic will happen! Your hard work will turn into golden muffins that look like they came from a bakery. It’s so exciting to see them transform right before your eyes!

Optimal Oven Settings and Rack Position
Getting the right baking temperature is key for great results! I preheat my oven to 375°F and place the rack in the center. This ensures even heat.
My secret for those beautiful dome tops is simple. Bake at 375°F for the first 5 minutes, then at 350°F for the rest. This initial heat works wonders!
It’s important to use the center rack for good air flow. Too high, and the tops will brown too fast. Too low, and the bottoms might get soggy.
Adding Streusel at the Right Moment
Timing is everything for the streusel topping. Wait until the muffins have set a bit but haven’t risen fully. That’s when you add it!
Open the oven door gently and sprinkle the streusel on top quickly. This prevents it from sinking and gives you those craggy, bakery-style peaks we all love!
Doneness Testing Methods
Knowing when your muffins are done takes practice, but I’ve got some oven techniques for you! There are several ways to check if they’re done.
Visual Indicators
Your eyes are your best tool here! Look for golden-brown tops that make you hungry. The edges should start to pull away from the pan.
Gently touch the center of the muffin. It should spring back lightly. No wet batter should be visible, and the streusel should be golden!
Internal Temperature Check
For sureness, use an instant-read thermometer! The internal temperature should be 200-205°F. This means your muffins are perfectly baked.
The toothpick test works too. Insert it into the center – it should come out with a few moist crumbs, not wet batter.
| Baking Stage | Temperature | Time | What to Look For |
|---|---|---|---|
| Initial Baking | 375°F | 5 minutes | Muffins start rising |
| Add Streusel | 375°F | 10 minutes | Batter partially set |
| Reduce Heat | 350°F | 10-15 minutes | Golden tops forming |
| Final Check | 350°F | 18-22 minutes total | Internal temp 200-205°F |
Trust your nose too – when your kitchen smells incredible and those golden muffins look perfect, they’re ready! There’s nothing like pulling a perfect batch from the oven!
Cooling and Storage Best Practices
Your freshly baked apple cinnamon muffins deserve the best cooling and storage. The way you handle them after baking is key. It can make all the difference between soggy disappointments and delicious treats that last for days.
It’s tempting to eat one straight from the oven. But waiting a bit is worth it! Proper cooling methods help your muffins stay tender and not gummy or dense.
Proper Cooling Technique
Here’s a foolproof cooling process that works every time! Let your muffins rest in the pan for exactly 5 minutes after baking. This brief time helps them set up right and makes them easier to remove.
After 5 minutes, move each muffin to a wire cooling rack. This lets air circulate around them, avoiding a soggy bottom. Use a thin spatula or butter knife to lift them out – they should come out easily if your pans are greased right.
Let them cool completely before storing – this takes about 30-45 minutes. Waiting is hard, but it prevents that gummy texture that happens when muffins are too hot.
Short-Term and Long-Term Storage Options
Once your muffins are cool, it’s time to think about muffin storage! I’ve tried every method, and here’s what works best.
For short-term storage, these muffins stay fresh for 2-3 days at room temperature. Store them in an airtight container or cover with plastic wrap. Don’t refrigerate them – it makes them stale faster!
For longer storage, wrap each muffin in plastic wrap and freeze for up to 3 months. This is my go-to meal prep trick – I often make a double batch and freeze half!
| Storage Method | Duration | Best For | Reheating Instructions |
|---|---|---|---|
| Room Temperature (Airtight) | 2-3 days | Quick consumption | Ready to eat |
| Refrigerator | Not recommended | Avoid this method | Makes muffins stale |
| Freezer (Wrapped) | Up to 3 months | Meal prep & bulk storage | Microwave 30-45 seconds |
| Freezer (Container) | 1-2 months | Family portions | Oven 300°F for 10 minutes |
Here are my top freshness tips for reheating frozen muffins: microwave one for 30-45 seconds, or warm it in a 300°F oven for about 10 minutes. Either way, they’ll taste like you just baked them!
The secret to great muffins isn’t just in the baking – it’s in how you treat them afterward. Proper cooling and storage turn good muffins into exceptional ones that taste fresh days later.
Troubleshooting Common Baking Issues
Let’s tackle those pesky muffin troubles together and get your baking back on track! Every baker faces challenges, and I’ve been there too – staring at a batch that didn’t turn out quite right. The good news is that most baking problems have simple solutions once you know what to look for!
Don’t get discouraged if your first attempt isn’t perfect. Muffin troubleshooting is part of the learning process, and each batch teaches us something valuable. I’ve made countless batches over the years, and those “oops” moments have made me a much better baker!
Fixing Dense or Tough Muffins
Dense, heavy muffins are usually the result of overmixing your batter. When you stir too vigorously or for too long, you develop the gluten in the flour, creating tough texture issues. Remember, those lumps in your batter are actually your friend!
The secret is gentle folding – just until the ingredients are barely combined. I use a rubber spatula and fold from the bottom up, turning the bowl as I go. Stop mixing as soon as you don’t see any dry flour streaks. Your batter should look a bit lumpy and rough – that’s perfect!
Addressing Dry Texture Problems
Dry muffins can be heartbreaking, but they’re usually caused by overbaking or incorrect measurements. First, check your oven temperature with a thermometer – ovens can run hot and fool us! Many home ovens are off by 25 degrees or more.
Measuring flour correctly is key for avoiding baking problems. I always spoon flour into my measuring cup and level it off with a knife. Scooping can pack in up to 30% more flour than needed!
If you live in a dry climate, try adding an extra tablespoon of milk or oil to your batter. Sometimes our environment affects our ingredients more than we realize.
Preventing Soggy Bottoms
Nobody wants soggy-bottomed muffins! This frustrating issue usually happens when there’s too much moisture or improper baking conditions. Make sure your oven is fully preheated before putting your muffins in – this is non-negotiable!
Use the center rack position for even heat distribution. Avoid overfilling your muffin cups – they should be about 2/3 full, no more. If you’re dealing with humid weather, you might need to bake for an extra 2-3 minutes.
Here’s a pro tip from my kitchen: let your muffins cool in the pan for just 5 minutes, then turn them out onto a wire rack. This prevents steam from building up underneath and creating soggy bottoms. Muffin troubleshooting becomes second nature once you understand these simple principles!
Delicious Variations and Serving Suggestions
Apple cinnamon muffins are amazing because you can change them up so much! Once you know the basic recipe, you can make something new every time. It’s all about the recipe adaptations!
I love trying out different mixes. Each one adds its own special touch!
Creative Flavor Combinations
Try these muffin variations to mix things up! Add chopped walnuts or pecans for a nice crunch. They go great with the apples.
For a sweet and tangy twist, add dried cranberries. Or, drizzle cooled muffins with homemade caramel sauce for a caramel apple treat. It’s so good!
Chocolate fans will love mini chocolate chips with the apples. Don’t be afraid to try different spice blends like cardamom or ginger. They add unique flavors that will surprise you.
Perfect Occasions and Presentation
These treats are perfect for many occasions! Here are some of my favorite serving ideas:
| Occasion | Serving Style | Special Touch |
|---|---|---|
| Weekend Brunch | Warm with butter | Fresh fruit and coffee |
| Lunchbox Treats | Room temperature | Individual wrapping |
| Fall Gatherings | With hot cider | Powdered sugar dusting |
| Special Events | Vanilla glaze drizzle | Decorative presentation |
In apple season, I take these to tailgate parties and potluck breakfasts. They’re easy to transport and always a hit!
The best thing about these recipe adaptations is how they fit your family’s tastes and dietary needs. Whether it’s brunch or welcoming new neighbors, these muffins always impress!
Apple Cinnamon Muffins with Streusel
Ingredients
- 2 cups all-purpose flour
- 1 tbsp baking powder
- ½ tsp salt
- ¾ cup granulated sugar
- 2 tsp ground cinnamon
- 2 large eggs
- ½ cup unsalted butter, melted and cooled
- ¾ cup whole milk
- 1 tsp pure vanilla extract
- 1½ cups peeled and diced apples (Granny Smith or Honeycrisp)
- 1 tbsp flour (for tossing with apples)
Streusel Topping
- ½ cup all-purpose flour
- ⅓ cup brown sugar
- 1 tsp ground cinnamon
- ¼ cup cold unsalted butter, cubed
Instructions
- Preheat oven to 375°F. Line a muffin tin with liners or grease well.
- In a large bowl, whisk together flour, baking powder, salt, sugar, and cinnamon.
- In another bowl, whisk eggs, milk, melted butter, and vanilla until combined.
- Toss diced apples with 1 tbsp flour, then fold into the dry ingredients.
- Pour wet ingredients into dry and gently fold until just combined.
- In a small bowl, mix streusel ingredients and cut in cold butter until crumbly.
- Fill muffin cups ¾ full, sprinkle with streusel topping.
- Bake for 20–22 minutes or until golden and a toothpick comes out with moist crumbs.
- Cool in the pan for 5 minutes, then transfer to a wire rack to cool completely.
Notes
- Use tart apples like Granny Smith for the best structure and flavor.
- Don’t overmix the batter — a few lumps are okay.
- Muffins freeze well for up to 3 months. Wrap individually and reheat as needed.
Conclusion
You now have everything you need to make these amazing bakery-style muffins at home! They’re perfect for a fall morning with tender apples, warm cinnamon, and a crumbly streusel topping.
Homemade baking fills your home with amazing smells. When you take these golden muffins out of the oven, you’ll see why they’re a favorite. Plus, you can make them your own with all the variations we explored!
These fall recipes are great for bringing families together. Enjoy them with your morning coffee or share them at a weekend gathering. Each bite is a perfect mix of sweet apples and warming spices.
Don’t wait to start baking! Your kitchen will smell incredible, and everyone will want the recipe. I’m excited to hear about your baking success and which variations you love the most.
Happy baking! These muffins will become a special part of your fall tradition.