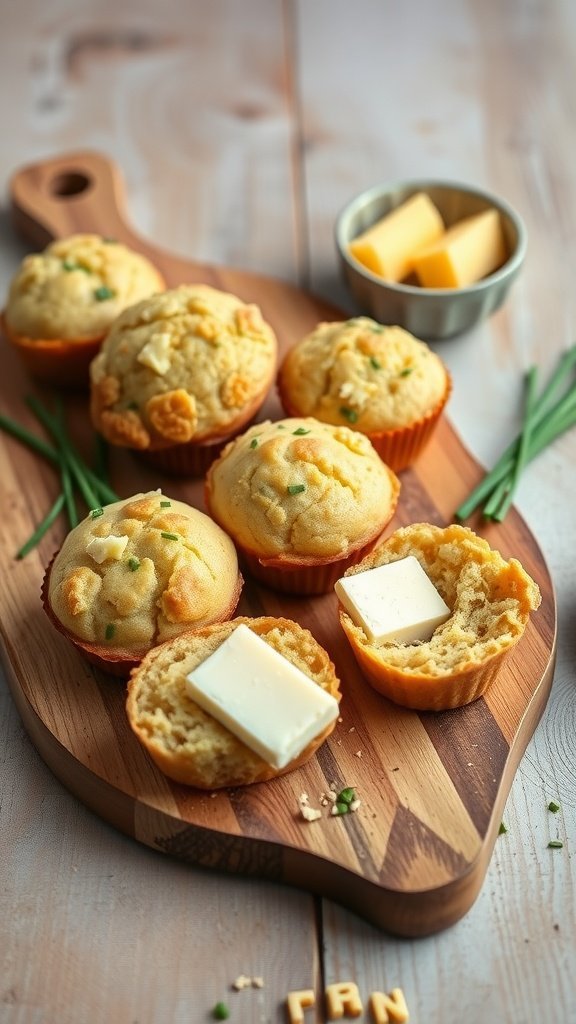
Savory Cheddar and Chive Muffins
This post may contain affiliate links. As an Amazon Associate, I earn from qualifying purchases. If you click and buy, we may earn a small commission at no extra cost to you. Learn more.
Welcome to my kitchen, fellow baking enthusiasts! I’m excited to share a favorite recipe that always gets rave reviews. These muffins are filled with sharp, tangy cheese and fresh herbs. They make your taste buds do the happy dance!
I’ve been making these savory muffins for years. They’re my go-to for cozy brunches and fancy dinner parties.
This easy muffin recipe is my favorite because it’s so versatile and easy to follow. Even if you’re new to savory baking, you’ll find it simple to make. They’re ready in just about 30 minutes.
When you smell these golden treats baking, you’ll see why I love sharing this recipe. The scent of melted cheese and herbs fills your home with pure comfort!
Contents
- 1 What Makes Savory Cheddar and Chive Muffins Special
- 2 Essential Ingredients for Perfect Savory Muffins
- 3 Equipment and Tools You’ll Need
- 4 Preparing Your Kitchen and Ingredients
- 5 Step-by-Step Savory Cheddar and Chive Muffins Recipe
- 6 Filling and Preparing Muffins for Baking
- 7 Baking Techniques for Perfect Results
- 8 Common Mistakes and How to Fix Them
- 9 Delicious Variations and Flavor Combinations
- 10 Serving Suggestions and Pairings
- 11 Storage and Reheating Guidelines
- 12 Savory Cheddar and Chive Muffins
- 13 Conclusion
- 14 FAQ
- 14.1 Can I substitute dried chives for fresh chives in these savory cheddar and chive muffins?
- 14.2 What type of cheddar cheese works best for these muffins?
- 14.3 How do I prevent my savory muffins from becoming dense or heavy?
- 14.4 Can I make these cheddar chive muffins ahead of time?
- 14.5 What’s the best way to reheat these muffins?
- 14.6 Can I add other ingredients like bacon or herbs to these muffins?
- 14.7 Why did my muffins stick to the muffin pan?
- 14.8 How full should I fill the muffin cups with batter?
- 14.9 What temperature should I bake these muffins at?
- 14.10 Can I use different types of cheese in this recipe?
- 14.11 How do I know when my savory muffins are properly done?
- 14.12 What are the best serving suggestions for these muffins?
Key Takeaways
- Quick 30-minute recipe perfect for busy schedules
- Versatile enough for breakfast, brunch, or dinner parties
- Beginner-friendly with foolproof instructions
- Features sharp cheese and fresh herbs for bold flavor
- Creates an amazing aroma that fills your kitchen
- Great make-ahead option for meal planning
What Makes Savory Cheddar and Chive Muffins Special
These savory cheddar and chive muffins are more than just baked goods. They’re a game-changer for your kitchen. I’ve made them for years, and they always impress everyone. The mix of sharp cheddar and fresh chives is magic.
These chive muffins make any meal special. They mix comfort with sophisticated flavors, pleasing both kids and adults. You get a tender muffin with melted cheese and herbs.

The Perfect Balance of Flavors
The secret to great savory baking is finding harmony in flavors. Sharp cheddar adds a creamy base with a bit of bite. Fresh chives add a light, herbaceous touch.
Finding the right ratio is key. Too much cheese, and the chive flavor gets lost. Too little, and the muffins taste bland. When balanced, each bite is a mix of flavors that work together.
Versatility for Any Meal
These breakfast muffins are perfect for any time. Serve them warm with scrambled eggs for brunch or on busy weekdays. They’re filling but light.
They’re also great with soups, stews, and salads for lunch or dinner. At dinner parties, they often outshine the main dish! Their savory taste is perfect for any meal.
| Meal Occasion | Perfect Pairings | Serving Style | Guest Appeal |
|---|---|---|---|
| Breakfast | Scrambled eggs, bacon, fresh fruit | Warm from oven | Family-friendly |
| Lunch | Tomato soup, garden salad, chili | Room temperature or warmed | Comfort food lovers |
| Dinner | Roasted vegetables, hearty stews | Warm with butter | Sophisticated palates |
| Entertaining | Wine, cheese boards, appetizers | Mini versions or sliced | Crowd-pleasing |
These muffins are special because they blend sweet and savory traditions. They offer comfort and bold flavors for any time of day!
Essential Ingredients for Perfect Savory Muffins
The secret to amazing cheddar and chive muffins lies in the quality of your ingredients. I’m excited to share my tips for picking the best muffin ingredients. Each one is key to making those soft, tasty homemade muffins everyone loves!
Knowing how each ingredient affects the muffins’ texture and taste boosts your confidence. I’ll guide you through my proven method for selecting the perfect ingredients. This ensures your exceptional cheese muffins turn out just right every time!
Choosing the Right Cheddar Cheese
For these savory treats, sharp or extra-sharp cheddar is the best choice. Its bold, tangy flavor gives the muffins that perfect cheese kick. Always grate your own cheese from a block instead of using pre-shredded.
Grating from a block ensures even melting and avoids anti-caking agents that can mess with texture. The extra effort in grating makes a huge difference. You’ll see how the cheese spreads evenly, creating those lovely pockets of melted goodness.
Fresh vs. Dried Chives
Go for fresh chives whenever you can! They offer a bright, mild onion taste that dried chives can’t match. Plus, they add a beautiful green color to your muffins.
If you must use dried chives, use about one-third the amount and rehydrate them first in warm water. This step helps restore their flavor and prevents them from drying out your batter. Fresh chives will give your muffins that restaurant-quality taste!
Flour and Leavening Agents
All-purpose flour is essential for the perfect tender crumb in these cheese muffins. It’s the only flour type I recommend for this recipe, as it provides the ideal texture balance.
Make sure your baking powder is fresh – it should fizz when mixed with water. Old baking powder won’t give the right rise, leading to dense muffins. Salt is also key, as it balances the cheese’s richness and enhances all flavors beautifully!
I also add a pinch of garlic powder and a dash of paprika for extra depth. These optional ingredients make your muffins extra special. They give them that gourmet bakery flavor that will have everyone wanting your secret!
Equipment and Tools You’ll Need
Let me share the essential tools that will make your muffin-making experience amazing! The right muffin baking tools are key to perfect, fluffy muffins. Without them, your muffins might stick to the pan.
Making savory cheddar and chive muffins is simple. You don’t need fancy gadgets or professional equipment! Just a few important baking equipment pieces will help you succeed every time.
Muffin Pans and Liners
Your choice of muffin pans is critical for success! I recommend standard 12-cup muffin tins made from heavy-gauge aluminum or steel. These materials ensure even heat, preventing hot spots that can ruin your muffins.
Paper liners make muffin removal and cleanup easy. If you prefer not to use liners, butter or cooking spray your pans well. Sticking muffins are a disappointment!
Pro tip: Dark-colored pans brown muffins faster, so bake them a few minutes less. Light-colored or shiny pans give better control over browning.
Mixing Tools and Measuring Equipment
Your mixing setup is vital for the perfect muffin texture! You’ll need a large mixing bowl and a medium bowl for wet ingredients. A whisk is great for blending dry ingredients.
For the final mix, use a large wooden spoon or silicone spatula. Be gentle with your batter! Overmixing can ruin tender muffins.
Accurate measuring is key for consistent results. A reliable set of measuring cups and spoons is essential. A kitchen scale is even better for precise results.
| Essential Tool | Purpose | Why It Matters | Budget-Friendly Option |
|---|---|---|---|
| 12-cup muffin tin | Baking vessel | Even heat distribution | Basic aluminum pan |
| Large mixing bowl | Combining ingredients | Prevents spillage during folding | Glass or stainless steel |
| Measuring cups/spoons | Accurate portions | Consistent results every time | Plastic measuring set |
| Box grater | Cheese preparation | Fresh cheese melts better | Four-sided hand grater |
Don’t forget a good box grater for your cheddar cheese! Fresh-grated cheese melts better than pre-packaged. Keep a small fine-mesh strainer handy for sifting flour if needed.
Having all your muffin baking tools ready before you start makes the process smoother. Set everything up first, and you’ll feel like a pro baker in no time!
Preparing Your Kitchen and Ingredients
The secret to perfect muffins starts long before you crack your first egg. It’s all in the prep! Smart baking preparation turns a stressful scramble into a smooth, enjoyable experience. I always tell my friends that the magic happens when everything is ready and waiting for you!
Let me guide you through creating the perfect setup for muffin success. First, preheat that oven to 375°F. We want it nice and hot when our batter is ready! This is the foundation of good kitchen setup that professional bakers swear by.
Setting Up Your Workspace
Creating an organized workspace is key to successful baking preparation! Think of it as setting the stage for a delicious performance. Clear your counters completely – you’ll need more space than you think!
Gather all your tools first: mixing bowls, measuring cups, spoons, and that trusty muffin tin. Line up everything within arm’s reach because once you start mixing, there’s no time for hunting around! I always place my largest mixing bowl in the center with smaller bowls arranged around it.
Don’t forget to have your muffin liners ready and your ice cream scoop or large spoon standing by for portioning. This kind of thoughtful kitchen setup makes the whole process feel like a delightful dance!
Ingredient Preparation and Room Temperature Tips
Smart ingredient prep is where the real magic begins! The most important rule? Get those eggs and milk to room temperature – this helps everything blend together beautifully. If you forgot to take them out early, don’t panic!
Here’s my quick fix: place eggs in a bowl of warm water for 5-10 minutes. For milk, just microwave it for about 20 seconds – easy peasy! Room temperature ingredients mix more easily and create better texture in your muffins.
Grate your cheddar cheese fresh if you’re using a block – I promise the extra effort pays off with better flavor! Chop your chives finely and set them aside. If using fresh chives, give them a gentle rinse and pat them completely dry first.
| Ingredient | Preparation Method | Time Needed | Pro Tips |
|---|---|---|---|
| Eggs | Room temperature | 30 minutes naturally | Warm water bath for 5-10 minutes if rushed |
| Milk | Room temperature | 30 minutes naturally | Microwave 20 seconds if needed |
| Cheddar Cheese | Freshly grated | 5 minutes | Use coarse grater for best texture |
| Fresh Chives | Washed and chopped | 3 minutes | Pat completely dry before chopping |
The key to successful ingredient prep is having everything measured and ready before you start mixing. Professional bakers call this “mise en place” – it’s French for “everything in its place” and it’s absolutely essential for muffin success!
Step-by-Step Savory Cheddar and Chive Muffins Recipe
It’s time to start making these delicious muffin recipe steps! I’m excited to help you through this easy process. It’s rewarding and fun.
We’ll go through each step of making the perfect muffin batter. We’ll take our time and do it right!
Mixing the Dry Ingredients
Begin by using a large mixing bowl. This is where the magic starts! Whisk together 2 cups of all-purpose flour, 2 teaspoons of baking powder, and 1 teaspoon of salt until everything is evenly mixed.
It’s satisfying to hear the whisk swoosh as it mixes the dry ingredients. If you’re adding garlic powder or black pepper, add them now!
Make sure there are no lumps in your flour mixture. Whisk it well – it might work your arm a bit, but it’s worth it!
Combining Wet Ingredients
Now, let’s move to your medium bowl for the wet ingredients. Beat together 2 large eggs, 1 cup of milk, and 1/3 cup of melted butter until smooth.
Remember, let the melted butter cool for a minute or two. You don’t want scrambled eggs in your batter. Trust me on this!
The mixture should be smooth and creamy. If you see butter chunks, whisk it again.
Folding in Cheese and Chives
This is my favorite part! Gently fold in 1 cup of grated sharp cheddar cheese and 1/4 cup of chopped fresh chives into your batter.
Think of this step as wrapping the ingredients in a cozy blanket of batter. Use gentle folding motions to mix everything evenly.
The cheese and chives should be scattered throughout the muffin batter like little pockets of flavor. They’ll surprise you in every bite!
Proper Mixing Technique
Now, let’s avoid a common mistake. The secret to perfect muffins is the mixing technique. Pour your wet ingredients into the dry ingredients and fold them together with a large spoon or rubber spatula.
Remember, lumpy is lovely! Your batter should look rough and a bit uneven. A few streaks of flour are okay – even preferred!
The perfect muffin batter looks like it needs more mixing, but resist that urge! Overmixing creates tough, dense muffins that nobody wants.
Stop mixing when you can’t see any more dry flour. The whole process should take no more than 10-15 gentle folds.
| Mixing Stage | Tool to Use | Key Technique | What to Look For |
|---|---|---|---|
| Dry Ingredients | Wire Whisk | Vigorous whisking | Even distribution, no lumps |
| Wet Ingredients | Wire Whisk | Beat until smooth | Creamy, well-combined mixture |
| Combining Wet & Dry | Large Spoon/Spatula | Gentle folding | Lumpy, barely combined batter |
| Adding Mix-ins | Rubber Spatula | Light folding motions | Evenly distributed ingredients |
Your muffin batter is now ready for the next exciting step! It should look rustic and inviting, with visible chunks of cheese and flecks of green chives throughout.
Filling and Preparing Muffins for Baking
Filling those beautiful cups and adding the perfect finishing touches is my favorite part. This stage of baking preparation brings your kitchen to life. You can almost taste those golden, cheesy muffins!
Getting your workspace organized is key for professional-looking results. Clear some counter space and have your muffin tin ready. A damp towel nearby for quick cleanups is a lifesaver!

Portioning the Batter
Proper muffin portioning is essential! Use an ice cream scoop or large spoon to divide the batter evenly. Fill each cup about two-thirds full for those beautiful, bakery-style domed tops.
Don’t worry if they’re not perfectly even. Homemade charm is what makes these muffins special. The slight variations add character and show they’re made with love.
Try this trick: gently tap your muffin tin on the counter once or twice after muffin portioning. It helps settle the batter and eliminates air bubbles for even baking.
Adding Toppings and Final Touches
Now, it’s time for the fun part – muffin toppings that make them irresistible! Sprinkle a tiny bit of extra grated cheddar on top. This creates an amazing golden, slightly crispy cheese crust.
Want to get fancy? Add a light sprinkle of paprika for gorgeous color, or scatter a few extra chopped chives for that professional bakery look. A tiny pinch of coarse sea salt on top adds wonderful textural contrast and makes all the flavors pop!
For special occasions, try these muffin toppings combinations:
- Everything bagel seasoning for a savory crunch
- Freshly cracked black pepper and extra chives
- A light dust of garlic powder and parmesan
Take a moment to admire your beautiful creations before they head into the oven. Your baking preparation is complete, and these savory beauties are ready for their magical transformation!
Baking Techniques for Perfect Results
The baking stage is where all your careful preparation turns into golden, aromatic perfection! This is the moment when your muffin baking tips really pay off. I’m here to guide you through every step to ensure your savory cheddar and chive muffins turn out amazing every single time!
The key to success lies in understanding how heat works in your oven. Every detail matters when you want bakery-quality results at home.
Oven Temperature and Positioning
Position your oven rack right in the center of your oven – this is my number one tip for even baking! The center spot gives you the most balanced heat distribution. It prevents those tops from browning too quickly while keeping the bottoms from getting soggy.
Set your oven temperature to exactly 375°F and make sure it’s fully preheated before you slide those beauties in. I always wait at least 15 minutes after my oven beeps to ensure it’s truly ready. This consistent heat is what creates that perfect rise and golden color we’re after!
Timing and Doneness Tests
Set your timer for 18-20 minutes, but don’t rely on baking time alone! Every oven has its own personality. I always start checking around the 17-minute mark because it’s better to catch them at the perfect moment.
Here’s my foolproof doneness test: gently press the top of a muffin with your finger. It should spring back lightly when perfectly done. The tops will be golden brown and smell absolutely heavenly!
My favorite method is the toothpick test. Insert a toothpick into the center of one muffin. It should come out with just a few moist crumbs clinging to it. Completely clean means they’re overdone!
Achieving the Perfect Golden Top
That gorgeous golden color comes from proper heat circulation and timing. You’ll know you’ve nailed it when the tops are beautifully domed with maybe a few attractive cracks. Those little cracks actually show off the melted cheese inside – pure perfection!
If your tops are browning too quickly but the centers aren’t quite ready, don’t panic! Simply tent them loosely with aluminum foil. Continue baking for a few more minutes until they pass the toothpick test.
The aroma will fill your kitchen with the most wonderful scent of melted cheese and fresh herbs. That’s when you know you’ve mastered these essential muffin baking tips and created something truly special!
Common Mistakes and How to Fix Them
Muffin troubleshooting doesn’t have to be stressful. Knowing common pitfalls and their solutions can help. I’ve made every mistake in the book and learned a lot. Now, I’m excited to share what I’ve learned with you.
Perfect muffins come from recognizing and fixing common issues early. Let’s go through the most common problems and their simple solutions!
Overmixing Issues
Overmixing the batter is the main reason for tough, chewy muffins. Stirring too much develops the gluten in the flour. This makes muffins dense with tunnel-like holes.
My golden rule is: mix just until the ingredients are barely combined. Your batter should look lumpy and rough. Use a gentle folding motion with a rubber spatula, turning the bowl as you go.
Stop mixing when you can’t see any dry flour streaks. Trust me, those lumps will disappear during baking. You’ll get tender, fluffy muffins instead of dense ones!

Dense or Heavy Muffins
Dense muffins often come from a few common mistakes. Old baking powder is a sneaky culprit. Replace it every six months for best results. I write the date on mine with a permanent marker so I never forget!
Using too much flour is another major cause. Always spoon flour into your measuring cup and level it off with a knife. Scooping directly from the bag packs in way more flour than the recipe calls for.
Cold ingredients can also make muffins heavy. Room temperature eggs, milk, and butter blend better and create lighter results. Plan ahead and take everything out about an hour before baking!
Uneven Baking Problems
Uneven baking often points to oven issues, not your technique. Hot spots in your oven can cause some muffins to brown faster than others. Always rotate your pan halfway through baking to ensure even results.
Incorrect rack positioning can also cause uneven baking. Place your muffin pan in the center of the oven for the most consistent heat circulation. Too high and the tops brown too quickly; too low and the bottoms overcook first.
Resist the urge to peek! Opening the oven door too early lets heat escape and causes uneven temperature. Wait at least 15 minutes before checking on your muffins. If they’re browning too quickly on top but are raw inside, your oven temperature might be running hot – try reducing it by 25°F next time.
Remember, every “mistake” teaches us something valuable about baking. With these troubleshooting tips, you’ll be creating perfect cheddar and chive muffins every single time!
Delicious Variations and Flavor Combinations
Exploring new ways to make these savory muffins is thrilling! The basic cheddar and chive recipe is just the start. Simple ingredient swaps can lead to new flavors!
For great variations, balance is key. Use about half a cup of add-ins to enhance the muffin without overpowering it. This keeps your muffins tender and just right every time!
Different Cheese Options
Sharp cheddar is amazing, but other cheese options are exciting too! Gruyere adds a sophisticated, nutty taste that’s perfect for fancy brunches. It melts beautifully, adding depth to your muffins.
Pepper jack adds a delightful kick. Smoked gouda brings smoky richness. Aged white cheddar has a sharp bite. Mixing parmesan and mozzarella gives an Italian twist that’s divine.
Here’s a quick guide to my favorite cheese substitutions:
| Cheese Type | Flavor Profile | Best Pairing |
|---|---|---|
| Gruyere | Nutty, sophisticated | Fresh thyme |
| Pepper Jack | Spicy, bold | Cilantro |
| Smoked Gouda | Rich, smoky | Rosemary |
| Feta | Tangy, Mediterranean | Sun-dried tomatoes |
Herb Substitutions and Additions
Fresh herbs make these herb muffins truly special! Dill adds a bright, fresh taste perfect for spring. It pairs beautifully with cheese.
Rosemary brings an earthy, aromatic quality. Fresh thyme adds subtle sophistication. For Mediterranean flavors, try oregano or basil with feta and sun-dried tomatoes!
Pro tip: Always use fresh herbs for more flavor and appeal than dried ones!
Add-ins for Extra Flavor
Get creative with add-ins! Crispy bacon bits add smoky richness. Diced jalapeños add heat. Caramelized onions create sweet, savory complexity.
Sun-dried tomatoes bring Mediterranean flair. Roasted red peppers add color and sweet flavor. Try diced ham and scallions for a breakfast twist!
Pat wet ingredients dry before adding them. This keeps your muffin texture perfect. Balance is everything – these add-ins should enhance, not overpower, your flavors!
Serving Suggestions and Pairings
These muffins are perfect for many dishes. They’re great because they’re so versatile. They make every meal better.
They’re perfect for any meal or event. Whether it’s a cozy breakfast or a fancy dinner, they fit right in.
Breakfast and Brunch Ideas
At breakfast and brunch, they’re amazing. Serve them warm with scrambled eggs and bacon. It’s a flavor match made in heaven.
Adding butter and honey is a game-changer. Or toast them for an extra treat.
They’re great for breakfast sandwiches or with fruit salad. They impress everyone.
Soup and Stew Companions
They’re perfect with soups and stews. They’re strong but also tender. They match both thick and thin broths.
They’re amazing with tomato soup. It’s like a gourmet grilled cheese. They also pair well with potato leek soup or chicken stew.
The cheese and herbs are a great match for soups. They soak up broth but stay tasty.
Party and Entertaining Options
They’re stars at parties! They’re a hit at any event.
Serve them warm in a basket or on a platter. They’re great for any gathering, big or small.
Guests even use them as appetizer bases. The options are endless with these muffins.
Storage and Reheating Guidelines
Let me share the best ways to store and reheat your homemade muffins so they taste amazing every time! Proper storing muffins techniques will keep your savory treats fresh and delicious for days or even weeks. The secret is knowing which method works best for your timeline and taste preferences.
Enjoying perfectly preserved muffins that taste just as good as the day you baked them is the best. With these tried-and-true storage methods, you’ll never have to worry about waste or stale muffins again!
Short-term Storage Methods
For immediate enjoyment over the next few days, room temperature storage works perfectly! Always let your muffins cool completely before storing them. Any residual warmth creates condensation that leads to soggy, unappetizing muffins.
Here’s what I recommend for short-term storage:
- Airtight container at room temperature – keeps muffins fresh for up to 3 days
- Paper towel trick – place one in the bottom of your container to absorb excess moisture
- Refrigerator storage – extends freshness up to one week in an airtight container
- Individual wrapping – wrap each muffin in plastic wrap for extra protection
Freezing and Long-term Storage
Freezing muffins is absolutely the way to go for long-term storage! These savory treats freeze beautifully and maintain their texture and flavor for months. Proper freezing techniques ensure your muffins taste fresh-baked even after extended storage.
Follow these steps for perfect frozen storage:
- Wrap each cooled muffin individually in plastic wrap
- Place wrapped muffins in a freezer-safe bag or container
- Label with the date and type of muffin
- Store for up to 3 months in the freezer
When you’re ready to enjoy them, simply thaw at room temperature for about an hour. Impatient like me? Microwave frozen muffins for 20-30 seconds for quick thawing!
Best Reheating Techniques
The right reheating tips can bring back that fresh-baked texture and aroma! I love warming muffins in a 350°F oven for 5-8 minutes – it makes your kitchen smell amazing all over again.
Here are my favorite reheating methods:
- Oven method – 350°F for 5-8 minutes brings back bakery-fresh quality
- Toaster technique – split muffins in half and toast lightly for a crispy exterior
- Microwave option – 15-20 seconds works in a pinch, though texture won’t be as perfect
- Toaster oven – combines convenience with better texture than microwave
The oven method truly brings back that just-baked texture that makes these muffins so irresistible. Your family will think you just pulled them fresh from the oven!
Savory Cheddar and Chive Muffins
Bold, cheesy, and ready in just 30 minutes!
Ingredients
- 2 cups all-purpose flour
- 2 tsp baking powder
- 1 tsp salt
- 1/4 tsp garlic powder (optional)
- 1 cup grated sharp cheddar cheese
- 1/4 cup chopped fresh chives
- 2 large eggs
- 1 cup milk (whole preferred)
- 1/3 cup melted butter (cooled slightly)
Instructions
- Preheat oven to 375°F (190°C). Line or grease a 12-cup muffin tin.
- In a large bowl, whisk together flour, baking powder, salt, and garlic powder.
- In a separate bowl, whisk eggs, milk, and melted butter until smooth.
- Pour wet ingredients into dry ingredients. Gently fold until just combined (lumpy is good!).
- Fold in cheddar and chives without overmixing.
- Divide batter evenly into muffin cups (about 2/3 full). Optional: top with a pinch of cheese or chives.
- Bake for 18–20 minutes, or until a toothpick comes out with a few moist crumbs.
- Let cool 5 minutes in pan, then transfer to a wire rack. Serve warm!
Conclusion
You have everything you need to make amazing easy savory muffins. They will be a favorite in your kitchen. From picking the right sharp cheddar to mastering the gentle folding technique, you’re set for a tasty homemade baking adventure.
These Cheddar and Chive Muffins are more than just a recipe. They’re your ticket to muffin success. Serve them warm for Sunday brunch or take them on a picnic. They’ll bring everyone together at your table.
I can imagine you pulling out that first golden batch from the oven. The smell will fill your kitchen, and that first bite will show you why homemade is better. Your family will soon ask for these muffins at every meal.
Remember, every great baker starts with one recipe. These easy savory muffins will boost your confidence and inspire you to try new flavors. Maybe next time, you’ll add bacon bits or use rosemary instead of chives!
Your kitchen is calling, and your muffin tins are ready. Put on your apron, preheat the oven, and get ready to make something special. Happy baking!